
A Step-by-Step Guide to Creating an Impressive 30' River Table Epoxy Bar with LED Lighting
We're not just creating any bar, this is a stunning lighted LED river table epoxy bar start to finish. Follow along even if you are a beginner.
Trust me when I say, you'll want this eye-catcher as the centerpiece of your home or business. Follow along by watching this video tutorial https://youtu.be/CPxiv8dRD-c
Here are some of the products and tools you will want handy:
- Deep Pour Epoxy Resin - Get the Best Deep Pour Epoxy Here
- Tyvek Tape - Great for sheathing and protecting resin project areas
- Silicone Caulk - Great for sealing your epoxy project
- Mini Hand Torch - Rid Bubbles from epoxy resin with this
- Epoxy Resin Paddle for Drill - Mix epoxy more efficiently with this
- Powdered Pigment for Epoxy Resin - The best color additive for epoxy resin - Black Diamond Pigment
- Mixing Cups and Accessories - Buckets, Gloves, etc.
*We may use Amazon affiliate links to products we like, meaning if you buy something, we'll receive a small commission.
Groundwork: Prepping the Base
First things first—preparation is key.
We're starting with the unsung hero of our project: the base.
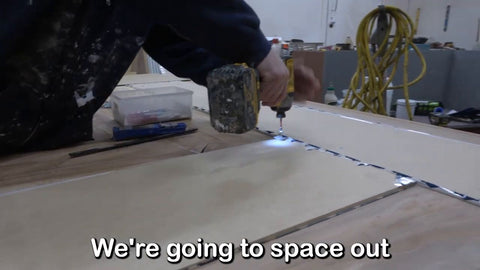
Imagine a robust half-inch MDF board lying before you. We'll dress it up with Tyvek tape to mask off our soon-to-be river area. It's crucial to secure these taped MDF boards firmly in place; we'll be screwing them down about every twelve inches. This technique ensures a snug fit, avoiding any unwanted movement during the pouring process.
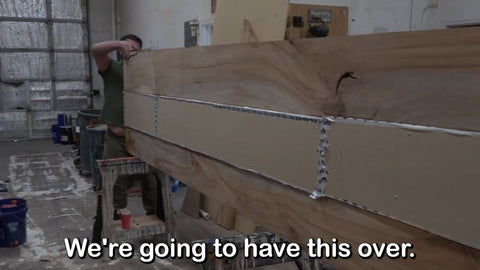
Remember, we're working upside down at this stage. Once flipped, you’ll see a clever little trick we've done—we've affixed additional boards across the top to cradle our wood planks that will later frame the river.
This is all about sealing the deal, quite literally! Instead of the traditional mold, we're creating a seal to prevent our epoxy from escaping. No one likes a leaky river.
Crafting the Epoxy Canvas
Before we can unleash the epoxy river, we have to line up our wooden planks, edges kissing edges, to form the riverbanks. Ensure a four to five-inch buffer on each side to avoid any surprises during the pour.
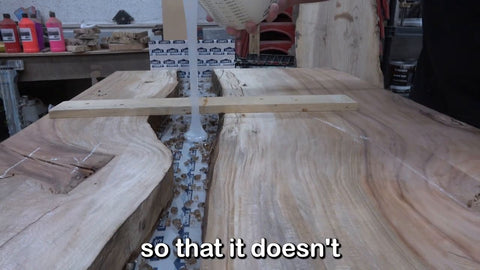
"And then comes the silicone—our secret weapon against leaks. It finds its way into every nook and cranny, sealing destiny. Trust the silicone; it's your ally in the epic battle against leaks."

Now, we're trusting silicone to act as a barrier along every seam and edge. This crucial step keeps the boat afloat—or, in our case, the epoxy in place. After all, with a bar this grand, spanning a majestic 30ft, we cannot afford riverbanks that crumble. This river is going nowhere but where we want it to!
The Riveting River Beginnings

Flipping to the top side reveals our prepped stage. The moment of truth is upon us. Ensuring everything is pancake-level, we can confidently start with our epoxy pour. But here's a pro tip—start thin. A clear super gloss epoxy layer seals any micro-leaks and lays the perfect foundation for our deep pour later on.
"We're setting the stage for sheer magnificence—a river that not only flows but also glows."
Chuck in some fire glass for that extra twinkle, reminiscent of a starry night or the bubbling cauldron of a volcano. It’s all about texture and luminescence, giving life to our table.
Pouring the Heart of the River
When it's time for the main event—the deep pour epoxy resin—it's all hands on deck. Following the recommendations, we stick to using three to four kits at a time to prevent a mass overheating disaster. Remember, it’s not just about depth but also the mass.

"Precision is key—repeat after me, consistent coloration. Each layer should mirror the last, holding a smoky secret within."
The beauty unfolds as the smoky grey hue begins to fill the riverbanks, mimicking a misty morning by the waterside. The vision is becoming a reality, with wood and epoxy entwining in an eternal dance.
Sanding, Sanding, and More Sanding

But our work is not over yet. Once the resin cures, out comes the sanders. It's time to smooth out any overflows and even out any imperfections. A tabletop this grand demands perfection.

The Grand Finale: A Glassy Surface
Attention to detail is what separates a good project from a great one. A Super Gloss Epoxy finish coat is strategically applied, transforming our rough diamond into a polished gem.
"Patience is a virtue, especially when you’re waiting for those pesky bubbles to rise. Then, a single pass with the torch, and like magic, you have liquid glass before you."

Illuminating the Depths
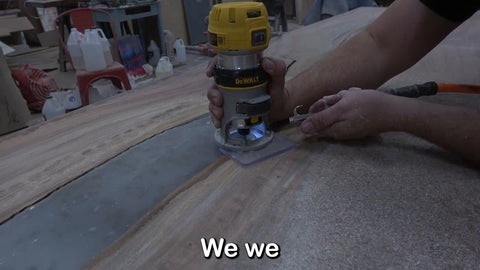
The final act in our symphony? Installing the LEDs. Picture a palm router meticulously carving channels where light will eventually dance, highlighting the river's essence. This is an intricate step, but oh, how crucial!
The Installation: Bringing it Home
You might think the hard work is behind us, but now it's all about placement, alignment, and securing our masterpiece in its final home.

"Double-check, triple-check. Every brace, every inch counts. The essence of craftsmanship lies in precision, and our beautiful bar deserves no less."

The LEDs wrap around, settle in their carved homes, and come to life. Each light etches out a portion of the river's story, ready to be admired by all.
Conclusion: The Creation of a Masterpiece

From toppling MDF boards to leveling out rivers, from mixing potions of epoxy to sanding down to the very grain—our bar is not merely a piece of furniture.
It's a testament to dedication, patience, and creativity. The result is a collective gasp, a pause in regular programming, as the LEDs take center stage in our lighted led river table bar.

We've enjoyed this journey, from lumber to LED. If this project left you hungry for more or with a burning question, share your thoughts in the comments.
Seriously, If you found this post helpful, show us some love so we can continue to keep making the ordinary, extraordinary!
Here's another HUGE river table post. This is a 6'x6' massive table. Check it out here 👉 https://www.theepoxyresinstore.com/blogs/news/make-diy-river-table-tutorial
👉👉 If you liked this video and want to see more
👉👉 Comment "Epoxy Resin Tutorial" because that does two things.
1. It lets us know you like it, and encourages our creators!
2. Commenting gives you a chance to win within one of our upcoming givesaways. -hint-hint
https://www.theepoxyresinstore.com/ is an expert manufacturer of various epoxy resins that can be used for both craft projects and industrial applications. We also offer liquid inks, dyes, pigments, glitter, other additives, and tools for various epoxy resin projects.
The Epoxy Resin Store
support@theepoxyresinstore.com
Phone: (951) 677-0400
Address: 540 Crane St suite A Lake Elsinore, CA 92530
https://www.theepoxyresinstore.com
Social Accounts:
https://www.facebook.com/TheEpoxyResinStore
https://twitter.com/epoxyresinstore
https://www.linkedin.com/company/the-epoxy-resin-store
https://www.youtube.com/channel/UC3NKcCrYL5uHK-sH5XMQ9HA
https://instagram.com/theepoxyresinstore
#epoxy #epoxyresin #theepoxyresinstore
*We may use Amazon affiliate links to products we like, meaning if you buy something, we'll receive a small commission.


1 comment
Epoxy Resin Tutorial
How can I find out more about this? I want to make a 60 inch by 14 inch table for my foyer. I’ve done smaller tables successfully but since I can’t find a mold for what I want to do, I need to build one. I plan to use driftwood, shells and resin. Does anyone there want to mentor me?
Martha