
Let's Transform a plain tumbler cup into a sparkling masterpiece by following this Two Part Series beginner-friendly tutorial. (Part 2 is below)
Level up your skills and you could be selling your creations online by following this epoxy resin tutorial perfect for beginners. https://youtu.be/pu_JgWM6ahg
Getting Started: Your Crafting Checklist
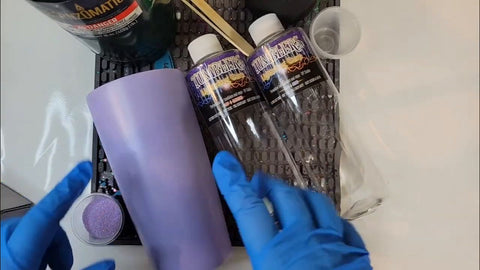
Before we get our hands glittery, let's ensure we have all the necessary supplies:
-
Safety first: Always wear gloves, old clothes, have good air circulation and use a mask when working with epoxy for protection. *Pro tip: Think about clean up now. How are you going to transition to clean up without making a mess?
-
Shimmer and Shine Glitter: We'll be using fine glitter for that perfect sparkle.
-
Mixing cups and accessories: Grab some mixing cups and sticks for epoxy preparation.
-
Premium Quality Epoxy: My go-to for quick applicaitions, is the Lightning Cure Epoxy Resin.
-
The Tumbler Cup: Your tumbler should be prepped—sanded, washed, and spray-painted, ready for the glitter.
-
Tumbler Turner: I like to use small footballs to stick to the turner tip which holds your cup securely.
-
Mini Epoxy Resin Torch to Bring the Heat and rid those epoxy bubbles: I prefer a large torch, but smaller ones get the job done too.
-
Foam Sanding Blocks: Easy to hold and scuff up your tumblers.
*We may use Amazon affiliate links to products we like, meaning if you buy something, we'll receive a small commission.
Remember, a well-prepped cup will result in a higher-quality finish. So don't skimp on the initial steps—your future tumbler will thank you!
Mixing the Magic: Preparing Your Epoxy
Let’s move on to the preparation of our lightning epoxy resin. Here's my approach:
-
Place the foam insert into the cup—it should be a couple of inches deep to prevent epoxy from fusing to the foam.
-
Measure out 7.5ml of part B and 7.5ml of part A of the epoxy, totaling 15ml.
-
Get mixing! Slowly stir the two parts together, scraping the sides and bottom of the cup to ensure a thorough blend.
Mix for 60 to 90 seconds—no more, no less. Small bubbles might appear, but these will be easy to pop with our torch later. Just watch out for those pesky micro bubbles!
The Moment of Sparkle: Applying Epoxy and Glitter
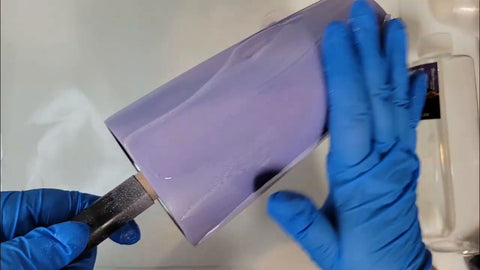
With our epoxy ready for action, the real fun begins. Spread a generous layer of epoxy onto your cup, ensuring an even coat that’s not too thin or too thick. This ensures that the glitter adheres well without creating a gloppy mess.
Now, sparkle time:
-
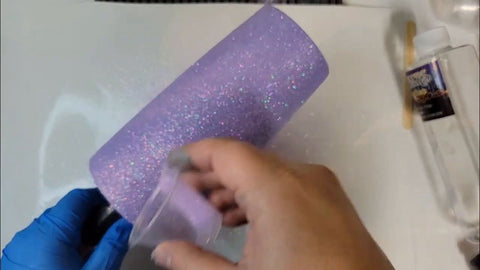
Sprinkle your glitter over the cup while it's still wet with epoxy. It’s raining glitter, hallelujah!
-
Catch any rogue glitter on a sheet of paper—you can funnel it back into your container for zero waste.
-
Make sure you coat the bottom of the tumbler, too. You wouldn't skip your base coat when painting your nails, would you?
Here’s a little pro tip:
Ensure that there's no excess epoxy on your cup. Too much epoxy can lead to uneven texture and an unprofessional finish. Simply wipe it off with your glove and it will smooth out during the turning process.
Perfecting Your Creation: Removing Bubbles and Sealing the Glitter
Now it’s time to bust out the torch. But be careful; this isn’t a crème brûlée!
A quick single pass is enough to pop any visible bubbles—overdo it, and you risk damaging the epoxy and glitter.
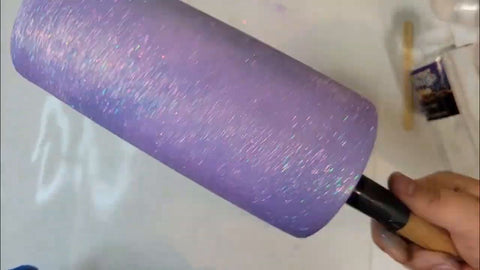
Once the bubbles are gone, keep adding glitter until you're happy with the coverage. A light ‘tap-tap’ on the cup will release any excess.
Next, we’ll roll and pat down to ensure the glitter is evenly pressed into the epoxy. Gentle does it—you want the glitter to stay, not stray or get smeared off!
Finishing the Custom Tumbler Cup with a glossy coat of epoxy resin (Part 2)
In part two of our glitter cup series, we're picking up right where we left off - getting our cup ready for some serious sparkle.
So, grab your epoxy and let's get spinning with the final touches in this beginner friendly epoxy resin tutorial! https://youtu.be/vA0pIPmcT0k
Preparing Your Cup for Epoxy
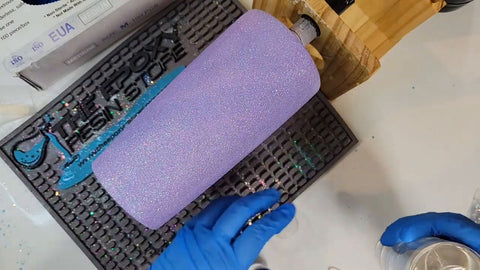
In our previous steps, we would have allowed our cup sit for about 20 to 30 minutes, it's time to get it on the spinner. Remember, it's crucial to keep that foam insert secure - we definitely don't want any epoxy sneaking in there and causing a sticky situation.
So, with a gentle push to ensure the insert is seated firmly, let's move on to the next step.
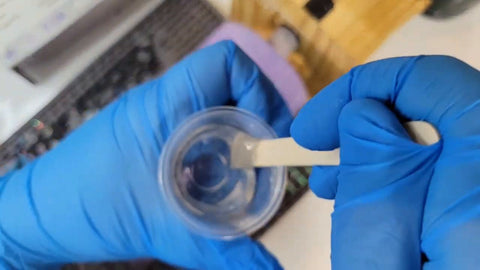
Once our cup is safely on the spinner, we'll need our mixing cup and a popsicle stick to whip up some epoxy magic. We're using a special kind just for tumblers, called lightning cure. Let's begin by measuring out our components - we need about 15 milliliters in total, so 7.5 milliliters of part B first, as it needs a slight moment to settle, and then another 7.5 milliliters of part A to complete the mix.
Mixing the Epoxy
Mixing epoxy can seem intimidating, but it's easier than it looks. Stir slowly for 60 to 90 seconds, making sure to scrape around the sides and bottom of your mixing cup. This thorough mixing is key to a smooth, even coat over your glittered cup. And speaking of coats, we aim for nothing less than perfection, which typically means at least two layers. But for now, let's get that first 15-milliliter layer ready.
As you mix, it's normal to see some bubbles appear. Don't stress over those; we'll take care of them later with a little heat magic. The important thing is to keep your movements slow and steady to get a well-incorporated mixture.

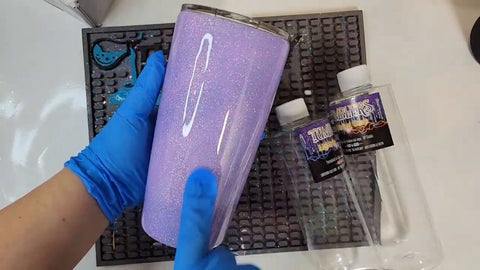
Applying the First Layer
Alright, it's showtime! Turn that spinner on - I prefer clockwise as I'm right-handed. If you're a leftie, just flip that direction. Now, gently pour the epoxy onto the spinning cup and let it glide over the glitter. No heavy-handedness here, just a light touch moving the epoxy into place, covering the cup completely from bottom to top.
Tip: Work from bottom to top to avoid any epoxy spills inside the rim of your cup.
Any excess should be wiped off at the bottom, or you can save it back in your cup. For those tricky bottom edges, dab a little epoxy on your finger and circle around for a smooth finish.
Locking In the Shine
Once you’ve covered every glittery inch, it's time to grab your torch. A quick pass with the heat will pop any pesky bubbles, ensuring a flawless surface for your tumbler.

Prepping for the Second Coat
Now, let's set the stage for the second act. After about eight minutes, our cup is a teensy bit tacky, which is actually perfect for layer number two. We'll repeat our earlier mixing steps - 7.5 milliliters of part B, followed by another 7.5 milliliters of part A, and then it's back to the stirring game for about 90 seconds. Keep those bubbles in check because that torch is on standby to zap them away.
But wait, there's a pro tip coming your way! To avoid any sticky glove disasters, just smooth some epoxy on your gloved hand before you start. This way, if you run out while spreading, there's no risk of your glove clinging to the cup like gum on a hot sidewalk.

Applying the Second Layer
Alright, take a deep breath and pour that epoxy right onto the cup, spreading it with finesse across the entire surface. Use one finger or your whole hand - whatever you're cozy with. Remember to catch any excess at the bottom or save it back in the cup for later.
Final Touches
After smoothing out the second layer to perfection, it's torch time again. Just a quick heat and then let your masterpiece be for about 20 to 30 minutes, and you're almost at the finish line.
The Reveal
Here it is, the moment of truth. Feast your eyes on the glittery glory that is your finished cup, sealed with two coats of lightning cure for a shine that just won’t quit.
Now we have this beautiful beginner epoxy resin skill in the books. This is a cup that's not only a treat for the eyes but also a testament to your crafting skills! Use this new skill and add some color, some decals, perhaps try hydro dipping.
Your skills can translate into dollars online. Thousands of people are selling their epoxy resin projects online and so can you.
And don't limit yourself to just tumblers, you can also create custom art like Melissa does in this epoxy resin video tutorial too.
Wrapping It Up
Thanks a bunch to @cynstumblers for sharing her tumbler tricks and tips!
👉👉 If you liked this video and want to see more
👉👉 Comment "Epoxy Resin Tutorial" because that does two things.
1. It lets us know you like it, and encourages our creators!
2. Commenting gives you a chance to win within one of our upcoming givesaways. -hint-hint
https://www.theepoxyresinstore.com/ is an expert manufacturer of various epoxy resins that can be used for both craft projects and industrial applications. We also offer liquid inks, dyes, pigments, glitter, other additives, and tools for various epoxy resin projects.
The Epoxy Resin Store
support@theepoxyresinstore.com
Phone: (951) 677-0400
Address: 540 Crane St suite A Lake Elsinore, CA 92530
https://www.theepoxyresinstore.com
Social Accounts:
https://www.facebook.com/TheEpoxyResinStore
https://twitter.com/epoxyresinstore
https://www.linkedin.com/company/the-epoxy-resin-store
https://www.youtube.com/channel/UC3NKcCrYL5uHK-sH5XMQ9HA
https://instagram.com/theepoxyresinstore
#epoxy #epoxyresin #theepoxyresinstore
*We may use Amazon affiliate links to products we like, meaning if you buy something, we'll receive a small commission.


