
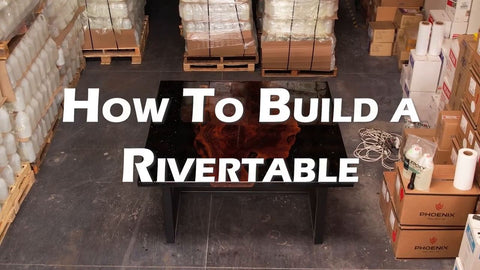
Hey builders, Brian Olivas here from The Epoxy Resin Store! Today, I'm thrilled to walk you through creating your very own majestic river table.
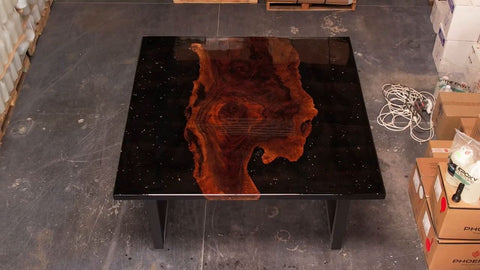
Picture this sprawling, six-by-six-foot masterpiece river table that's sure to captivate the gaze of any visitor inside your home.
Ready to learn how to do this? Let's roll up our sleeves and get started inside this quick video tutorial https://youtu.be/BF4nJrVWJlA
Products used in this tutorial:
- Deep Pour Epoxy Resin
- Super Gloss Epoxy Resin
- Tyvek Tape
- Silicone
- MDF/Melamine Wood
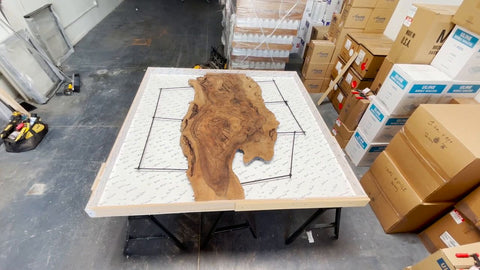
Crafting Your Mold: The First Step to a Stunning River Table
Before you get caught up in the anticipation of pouring a shiny epoxy coating, remember, a sturdy form is the linchpin of a splendid river table. For our colossal table, we constructed a form that's six feet six inches in every direction—just a wee bit larger than the table itself, giving you ample wiggle room.
Preparing the Base and Walls
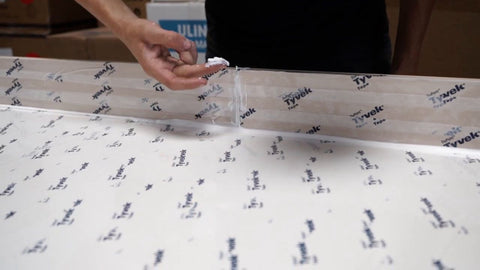
First things first, slice your wood panels to the perfect dimensions and fortify them using robust two by fours to craft a unified, solid piece. Now, for the critical part: sheathing your mold's base with Tyvek tape—overlap each strip by an eighth of an inch to banish any prospects of leaks. Don't forget to swathe the walls with the same tape for an impenetrable fortress.
"Take your time applying Tyvek tape to every nook and cranny—this isn't the place for haste. Ensuring your mold is leak-free is the cornerstone of your river table's success."
Giving the Form an Airtight Seal with Silicone
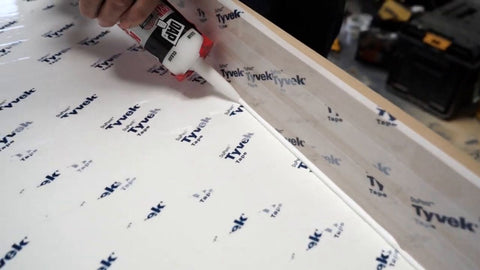
Once you're satisfied with your tape armor, unleash some silicone to seal every edge, knook and cranny, meticulously.
This is a prime moment to be thorough, securing not only the inside seams but the exterior edges as well. Trust me, you want your precious epoxy safe and sound within your mold. If there is a way for it to leak out... It will.
Setting the Wood and Pouring the Epoxy: The Heart of Your River Table
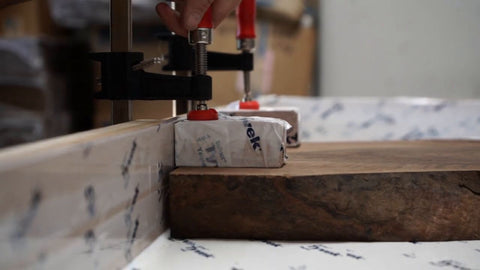
Adding extra support within the heavy river table
To provide extra support within the epoxy resin river table, I am embedding steel rebar within the wood and extending it outward to help support the weight of the epoxy. Although epoxy resin, is plastic in its cured state, it is also very heavy material.
Now, take your chosen wood and measure, snip, and dry fit it snugly in your form. Clamps are your best friend here—cinch down the wood to thwart any buoyant antics during the pour. And here's a pro tip: since we're dealing with a hefty river's edge, reinforce with rebar for an unyielding structure.
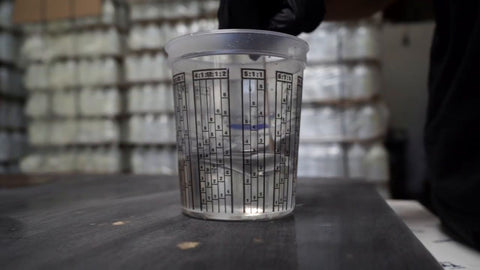
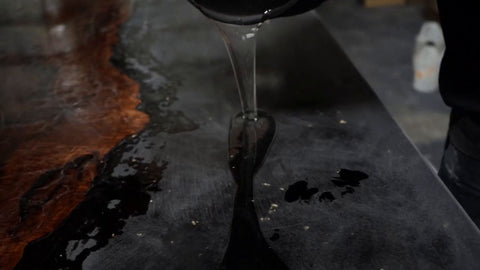
Time for the Epoxy

Ready to mix and pour the liquid treasure? Don't rush to dunk it all in one go—pour in layers, pals, especially when you're dealing with such volume. After each pour waits a full 48 hours before sanding lightly to ensure each layer grips firmly to the next, akin to a trusty mechanical bond.
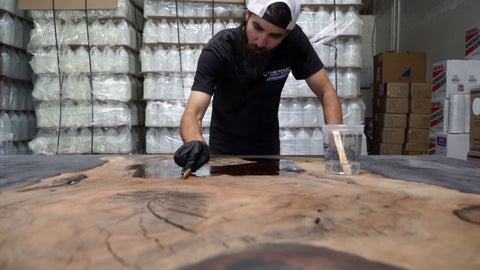
"Before your next pour, clean off any debris like you're on a treasure hunt—sparkling epoxy rivers detest the company of dust and grit."
Keep brushing on, sealing timber edges to thwart any rogue air bubbles from crashing your crystal-clear party. Keep an eye on the clock: pour again within 24 hours, and you can skip the sanding—tacky epoxy is like an open invitation for more.
The Finishing Touches: A Shimmering Surface and Sturdy Legs
With the final deep pour complete, it's time to unveil the beauty you've crafted. De-mold, trim, and hone your table to the dimension that whispers perfection. And then comes the sanding parade—smooth it out until it feels like glass under your fingertips.

Sealing with the First Top Coat
Mix your first top coat with care and lavish it only on the wood, sealing the stage for bubble-free subsequent coats. You're creating a stronghold here—ensure every crevice and cranny is fortified against air's invasion.
"On goes the routing rodeo—round those edges to transform them from sharp to superbly smooth. Now, mix up that supergloss epoxy and let the notch trowel be your guide to an even spread before you torch your way to a dazzling finish."
The Grand Finale: A River Table Ready for Spotlight
Legs assembled? Check. That last glossy coat hardening to a sheen? Double-check. Patience, is going to be very very important. We need to give it TIME to let it cure fully.
Now, your labor of love, this impressive river table, is ready to depart for its new home and bask in the limelight.
And that, my friends, is how we craft a river table from start to finish, tailored for delighting both creators and beholders. Thank you for following this tale of transformation—from humble materials to an elegant work of art. Happy crafting!
Remember, every creation is a fragment of your imagination come to life. If want more resin tips and tricks, keep an eye out for our upcoming epoxy projects.
Stay inspired, keep building, and let the rivers run wild!
To support Brian and his work, find him here he is an incredible artist!
Learning this skill can be a highly valuable skill. If you need more support let us know.
Happy crafting!
Stay tuned for more epoxy resin guides and be sure to check out our other blog posts for more tips and tricks.
Comment "Epoxy Resin Tutorial" Below if this was helpful to you and you want to see more.


6 comments
The table is awesome ! Just a quick question…I purchased a gallon kit of Platinum Clear for a 1" pour now I see that is not the right epoxy for that pour
I should have ordered Liquid Diamond. Can I use the Platinum in two 1/2" lifts?
A the next time I’ll know better…live and learn!
Epoxy resin tutorial
Epoxy Resin Tutorial
This truly inspires me.
I have to tell you i have worked with other products anhad some big failures. Right now my garage is full of projects i created over a week ago and they are still not cured. It didn’t feel right when i added the resin to the hardner and it was not thick to pour. So i am about to toss those with the molds i purchased.
What is the point of the torch?