

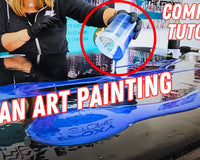
Today we are creating a tumbler that's not only is functional but flaunts an explosion of color and personality. Use this as a basis to get inspired to create with several other contrasting colors and designs you desire.
Here's how to create a hydro dipped tumbler in this epoxy resin art tutorial. See the easy step-by-step process in this DIY Video Guide here ▶ https://youtu.be/vjsXkGXgA40
What You'll Need to Get Started
-
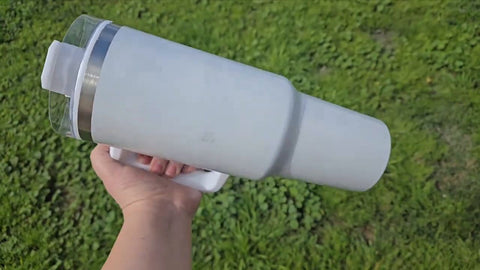
Tumbler of your choice – I'm using a 40-ounce tumbler today for its solid build and sleek surface.
-
A sturdy bucket – A five-gallon bucket will be your canvas for the magic we're about to create.
-
Spray paint – I'll be playing with a classic combination of black and red using Rustoleum 2X. We want atleast 2 colors.
-
A spinner – This handy tool will help you achieve that professional finish.
-
Protective gloves – Safety first, as always.
-
Tumbler's coating epoxy – For that glass-like sheen that's tough as nails.
-
Mixing cups and sticks – You'll want to be precise and thorough when mixing your epoxy.
-
A trusty torch – To banish any unsightly bubbles from your final masterpiece.
*We may use Amazon affiliate links to products we like, meaning if you buy something, we'll receive a small commission.
Now that we've got our gear in check, let’s tackle this awesome tumbler transformation step by step.
Step 1: Prep Your Tumbler
First thing's first, grab your chosen tumbler prepped and ready. I'm talking a nice sanding job and a base coat of spray paint. This can be with a drywall sanding block or some 220 and higher sanding paper.
This groundwork is key to making those colors pop and STICK to the tumbler. A light sanding will be enough to give the paint something to grab on to. This does not mean sanding down to the metal or sanding off what is on the cup. Just an evenly ALL OVER sanding job.
Step 2: Fill Your Bucket
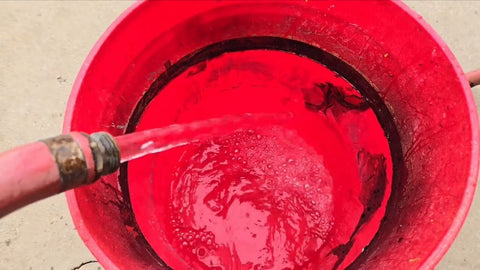
Fill that bucket three-fourths full with plain ol' water. Then comes the fun part!
Step 3: Time to Unleash the Colors
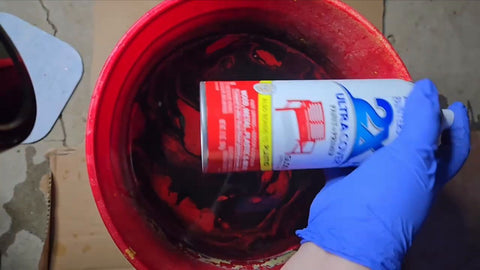
Grab those spray paints and alternate between your colors, spraying directly into the water—black, red, black, red. Like making a layered cake, but way cooler because it's paint on water!
You can add other pops of color to this too. The colors and shapes we see on top of the water is what will transfer to the tumbler.
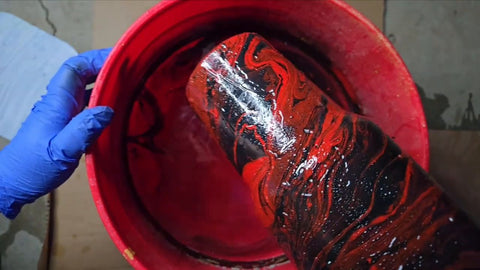
Step 4: The Dip of Destiny 😜
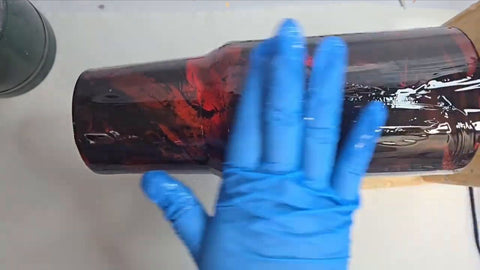
Once your water looks like a battleground between colors, it's time to DIP your tumbler. As I dip it in the water, I like to rotate slowly to ensure every inch gets kissed by color.
As you reach the rim, pull it out and BAM! Look at the masterpiece you've just created.
"Patience and practice is a virtue, especially in hydro dipping."
Keep trying out different ways of hydro dipping. Tilting slightly, spinning faster/slower, or dropping straight down and quickly lifting up can all lead to varied outcomes. Adding tape to parts of your tumbler to block out areas can also open up even more potential.
Now, the tough part – wait 24 hours 😎 . We want those colors to set and dry in place and get ready for their epoxy resin coating.
Step 5: Epoxy Time
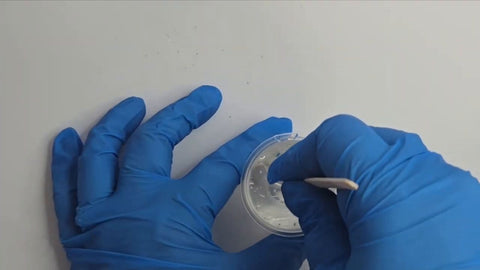
After the day-long anticipation, add the tumbler on your spinner. Before we epoxy, remember to tape off parts you want to keep clean, like where the handle attaches.
Ready to mix your epoxy? Go for a 1:1 ratio, 15ml of Part A and 15ml of Part B. Stir for three whole minutes, scraping the sides and bottom of the cup.
Consistency is essential.
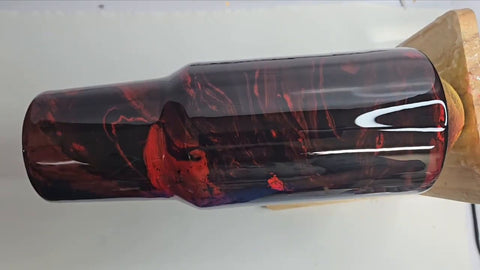
With our tumbler on the spinner, it's time to drizzle the Tumblers Epoxy Resin all over. Don't worry about getting it perfect; a bit extra is ok. Too Too much on the tumbler can leave it a bit globby. Yes globby is a technical term.
If there's excess, Simply scrape it back into the mixing cup.
Finish off with a pass of the torch to get rid of any bubbles, giving you that sleek, smooth finish you're after.
Step 6: The Final Wait
Once more, we exercise our patience and leave the tumbler on the turner and keep it turning. Depending on the type of epoxy your using, you could be done after 24 hours later or sooner if using our Lightning Cure Epoxy.
Step 7: The Big Reveal
Peel off the tape carefully, attach the handle, and there you have it a perfectly created hydro dipped tumbler that will turn heads and drop jaws even if you were a beginner.

Isn't she a beauty? Thank you so much for "sticking" through this tutorial with me.
Don't forget to hit that like button, subscribe to @TheEpoxyResinStore, and follow us on our social media channels to stay up to date with the latest and greatest in DIY crafts!
Also follow the creator Cyn @ CynsTumblers
👉👉 If you liked this video and want to see more
👉👉 Comment "Epoxy Resin Tutorial" because that does two things.
1. It lets us know you like it, and encourages our creators!
2. Commenting gives you a chance to win within one of our upcoming givesaways. -hint-hint
https://www.theepoxyresinstore.com/ is an expert manufacturer of various epoxy resins that can be used for both craft projects and industrial applications. We also offer liquid inks, dyes, pigments, glitter, other additives, and tools for various epoxy resin projects.
The Epoxy Resin Store
support@theepoxyresinstore.com
Phone: (951) 677-0400
Address: 540 Crane St suite A Lake Elsinore, CA 92530
https://www.theepoxyresinstore.com
Social Accounts:
https://www.facebook.com/TheEpoxyResinStore
https://twitter.com/epoxyresinstore
https://www.linkedin.com/company/the-epoxy-resin-store
https://www.youtube.com/channel/UC3NKcCrYL5uHK-sH5XMQ9HA
https://instagram.com/theepoxyresinstore
#epoxy #epoxyresin #theepoxyresinstore
*We may use Amazon affiliate links to products we like, meaning if you buy something, we'll receive a small commission.


2 comments
Robban
Epoxy Resin Tutorial
Elizabeth Adams
Once you are with the hydro, can you sublimate on that cup. Or do you just print and cut to add designs.