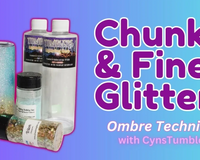
Create a Caramel Apple-Inspired Resin Tumbler: A Step-by-Step Guide for Teacher Appreciation
Here's a sweet crafting treat! With teacher appreciation on the horizon, what better way to say "Thanks!" than placing a handmade caramel apple mug on a desk?
This fun little project captures the charm of a fall favorite – the caramel apple – in the form of a durable and stylish tumbler. Follow along in this Tutorial perfect for beginners https://youtu.be/NlWEGUkYQfU
Lets create something amazing? Grab your supplies, and let's dive right in!
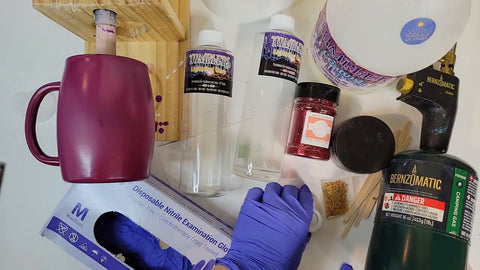
What You'll Need:
-
Acrylic Paint
-
Faux Peanuts
*We may use Amazon affiliate links to products we like, meaning if you buy something, we'll receive a small commission.
Most the above-mentioned products are available at The Epoxy Resin Store, or you can follow one of the referral links to Amazon.
Mixing Your Epoxy
First things first, let's prepare our epoxy.
The key to a successful cure is to mix equal parts of the resin and hardener. We're going to need 15 ml of Tumbler's Lightning Cure Epoxy – that's 7.5 ml of part A (resin) and 7.5 ml of part B (hardener).
Now folks, precision matters when using small amounts. Inaccuracy means your epoxy could end up a sticky mess, and nobody wants that!
Remember to mix slowly, scrape the sides and bottom of the cup, and mix no longer than 90 seconds to avoid pesky bubbles.Once your epoxy looks smooth and bubble-free, it's time to get that tumbler spinning on the turner.
Applying Epoxy and Glitter
Set your spinner to a comfortable rotation, preferably clockwise for right-handed folks like myself. Apply a thin layer of the epoxy on the mug so the glitter has something to stick to. Watch out for that handle – it can be a sneaky spot!
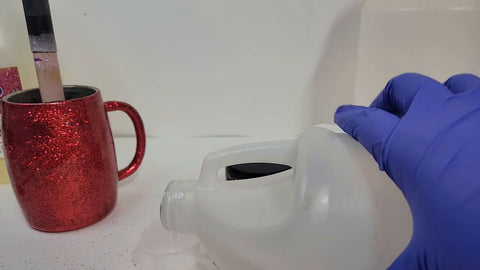
Next, let's transform this into a glittering masterpiece. Pour the glitter generously onto the spinning mug, catching the excess on a sheet of paper for reuse. We want our tumbler evenly covered but not drowning in the stuff.
“Make sure every spot of the cup is covered in epoxy – it's the canvas for your glittery creation.”
Once you're happy with your glitter coverage, gently pat it down with your gloved hand. This ensures the glitter stays flat for fewer epoxy coats down the line.
Coating with Epoxy
Now for another round of mixing and applying epoxy. We're using another 15 ml batch here. Pour it on the tumbler, coat every nook and cranny, and use a torch to pop any bubbles that arise. Be gentle, though – you don’t want to scorch your new artwork.

Just remember our little tip with the torch:"Use the underbelly of the flame, not the point, in a sweeping motion. Once around should do the trick."
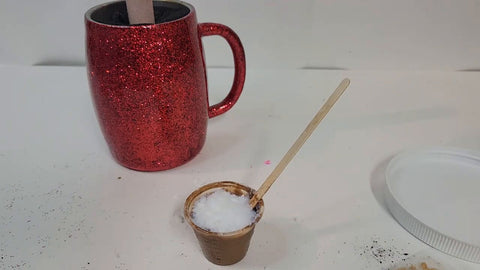
Adding the "Caramel"
Prepare for the fun part: creating the caramel drip effect. This time, we're switching to the Tumbler's Coating Epoxy because it's more accommodating when adding acrylic paint. It essentially give us more time to set it up.
Creating the perfect caramel hue is a balance between paint, mica powder, and getting the consistency just right. Mix carefully and slowly add the thickening powder until you achieve that lusciously thick caramel texture.
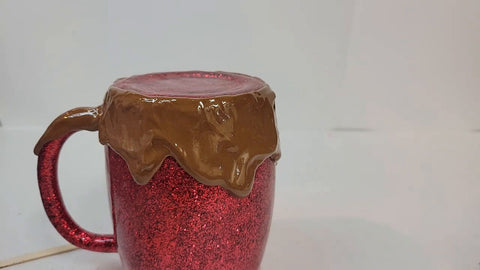
Slowly apply this around the rim of your tumbler, aiming for natural-looking drips. Then, for that authentic caramel apple touch, sprinkle those faux peanuts around the edges.
The epoxy should hold them in place as it cures.
Patience is now your best friend; allow the epoxy to set completely before touching it.
The Final Touch
After a significant dry time (think 24 hours), it's time to cover everything with a fresh coat of epoxy. This final layer seals in all your hard work.
Spin and coat, making sure to cover the handle area and those delicious-looking drippy parts. But be discerning; we want to maintain those beautiful 3D drips without overdoing it.
Cleaning Up the Rim

As our tumbler has set its shapes, a craft knife will become your clean-up buddy. Gently run it around the rim to ensure no epoxy sneaks where it shouldn't, and voilà – you've got yourself an enchanting caramel apple mug that any teacher or friend would adore.
Congrats! You've just crafted a beautifully unique caramel apple tumbler that is sure to be the apple of your teacher's eye.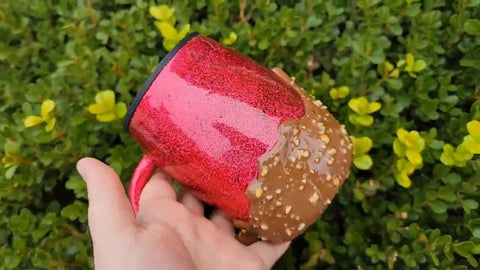
Don't forget to hit that like button, subscribe to @TheEpoxyResinStore, and follow us on our social media channels to stay up to date with the latest and greatest in DIY crafts!
Also follow the creator Cyn @ CynsTumblers
👉👉 If you liked this video and want to see more
👉👉 Comment "Epoxy Resin Tutorial" because that does two things.
1. It lets us know you like it, and encourages our creators!
2. Commenting gives you a chance to win within one of our upcoming givesaways. -hint-hint
https://www.theepoxyresinstore.com/ is an expert manufacturer of various epoxy resins that can be used for both craft projects and industrial applications. We also offer liquid inks, dyes, pigments, glitter, other additives, and tools for various epoxy resin projects.
The Epoxy Resin Store
support@theepoxyresinstore.com
Phone: (951) 677-0400
Address: 540 Crane St suite A Lake Elsinore, CA 92530
https://www.theepoxyresinstore.com
Social Accounts:
https://www.facebook.com/TheEpoxyResinStore
https://twitter.com/epoxyresinstore
https://www.linkedin.com/company/the-epoxy-resin-store
https://www.youtube.com/channel/UC3NKcCrYL5uHK-sH5XMQ9HA
https://instagram.com/theepoxyresinstore
#epoxy #epoxyresin #theepoxyresinstore
*We may use Amazon affiliate links to products we like, meaning if you buy something, we'll receive a small commission.